How to Build a Forex Trading Plan (Template + Step-by-Step)

Most retail traders lose money, often because they trade without rules. A forex trading plan fixes that. It turns your strategy into a written system you can execute, track, and improve.
In this guide, you will build a complete forex trading plan step by step, using a simple template. You will define your market and timeframes, set entry and exit rules, place stops and targets, size positions, and set daily and weekly risk limits. You will also set a routine for preparation, execution, and review, so you can spot mistakes fast and cut them.
You will leave with a plan you can print, follow, and update after every trading week.
Key Takeaways
- In het kort: Pick one market and 1 to 2 timeframes, then stick to them.
- In het kort: Write entry rules you can check in seconds, no interpretation.
- In het kort: Define exits before you enter, stop loss, take profit, and an invalidation rule.
- In het kort: Risk stays fixed per trade, position size changes.
- In het kort: Set hard daily and weekly loss limits, stop trading when you hit them.
- In het kort: Use a routine, prep, execute, review, then update the plan weekly.
A trading plan reduces random decisions. It forces the same process on every trade.
Your edge comes from repeatable rules, not from more indicators. Keep your setup count low. Track the same few metrics every week.
Risk control does the heavy lifting. Use a fixed percentage or fixed dollar risk per trade. Cap total exposure. Avoid stacking correlated positions.
Review turns the plan into a system. Log every trade. Record screenshot, setup type, stop size, R result, and rule breaks. Cut the mistakes first.
If your rules rely on indicators, define them in plain terms and fixed settings. Keep the inputs stable so your results stay comparable. If you need a simple framework for reading charts, start with technical analysis in forex.
What a Forex Trading Plan Is (and What It Isn’t)
Definition, Rules, Constraints, and Routines
A forex trading plan is a written set of rules, constraints, and routines that govern every trade you take.
It tells you what you can trade, when you can trade, how you enter, where you exit, and how much you risk.
It also tells you what you will not do. No exceptions. No improvising.
- Rules, entry triggers, stop placement, profit taking, trade management, news filters, and when to stand aside.
- Constraints, max risk per trade, max daily loss, max open risk, max correlation exposure, and which sessions you trade.
- Routines, pre market checklist, execution steps, post trade journaling, and weekly review.
Your plan exists to reduce decision load and prevent unforced errors. You follow it even after a win streak and even after a loss streak.
Trading Plan vs Trading Strategy vs Trading System
People mix these terms and end up with gaps. Keep them separate.
- Strategy, the edge. It defines the setup and the logic for entries and exits. Example, a breakout pullback with fixed criteria.
- Plan, the operating manual. It includes the strategy plus risk rules, time rules, market selection, and your routines.
- System, the full workflow that runs day to day. It combines the plan, execution, journaling, review, and performance tracking.
If you only have a strategy, you still need rules for sizing, limits, and process. If you only have a plan with no tested strategy, you have structure with no edge.
Common Myths That Derail Beginners
- I will decide in the moment. In live markets you react to price, P and L, and noise. You break rules first, then justify it later.
- A plan kills flexibility. A plan gives you controlled flexibility. You predefine what counts as a valid exception and when you stop trading.
- I just need better indicators. Most losses come from sizing, stops, and overtrading. Your plan must define risk and limits before tools.
- More trades means more profit. More trades often means more fees, more variance, and more mistakes. Your plan should cap activity.
- I can skip risk math. If you cannot state your risk per trade and expected payoff, you cannot measure performance. Use a defined risk-reward ratio.
Who Needs a Plan
- Beginners, you need guardrails. A plan stops random trades and forces you to learn one setup at a time.
- Part timers, you need speed. A plan tells you what to check and what to ignore when time is limited.
- Funded traders, you need compliance. A plan protects you from breaking loss limits, daily drawdown rules, and risk caps.
- Scalpers, you need precision. A plan sets exact triggers, stop sizes, max spreads, and when to stop after slippage or churn.
If you place real money at risk, you need a plan. The market does not reward good intentions. It rewards repeatable execution.
Why You Need a Trading Plan to Survive Forex
Reducing decision fatigue and emotional trading
Forex forces fast decisions. Fast decisions break when you feel pressure.
A trading plan removes choices you should not make in the moment. It tells you what to trade, when to trade, and when to do nothing.
- Pre-trade: your setup rules, time window, news filter, max spread, and required confluence.
- During trade: your entry trigger, stop placement, position size, and management rules.
- Post-trade: your journaling fields and review schedule.
When you follow the plan, you stop bargaining with the chart. You execute. You log. You move on.
Creating consistency for performance tracking and improvement
If you change your rules every week, your results mean nothing. You cannot separate skill from randomness.
A plan gives you a stable system. That makes your stats usable.
- You can track win rate, average win, average loss, and expectancy.
- You can group trades by setup, session, pair, and timeframe.
- You can spot one problem at a time, entries, stops, or exits.
Consistency turns trading into feedback. Without it, you only collect opinions.
If your plan uses trend and entry alignment, document your exact method for it. Use multi-timeframe analysis rules that you can repeat the same way on every trade.
Preventing risk-of-ruin through predefined limits
Most accounts blow up from a few bad decisions, oversizing, revenge trading, and removing stops.
Your plan must lock risk before you enter. You need hard limits you follow even when you feel confident.
- Risk per trade: a fixed percent or fixed amount.
- Max loss per day: stop trading after you hit it.
- Max loss per week: reduce size or pause after you hit it.
- Max open risk: cap total risk across correlated pairs.
- Max trades per session: limit churn and overtrading.
These rules keep a normal losing streak from becoming account damage you cannot recover from.
Setting expectations: what “normal” drawdowns look like for your method
Drawdowns happen even with a real edge. Your plan should define what you will tolerate before you change anything.
Set drawdown expectations from your backtest and forward test, based on your actual rules.
- Track your worst peak-to-trough drawdown in testing.
- Define an alert level where you reduce size and review execution.
- Define a stop level where you pause trading and re-validate the edge.
When you expect drawdowns, you stop reacting to them. You avoid panic tweaks that destroy your strategy.
Before You Write Anything: Define Your Trader Profile
Time Availability and Session Fit
Your plan must match your calendar. If it does not, you will miss trades or force bad ones.
- Pick your trading window. Write your available days and hours. Keep it fixed.
- Match that window to the session. Volatility and spreads change by session.
- Decide if you trade overlaps only. Overlaps usually bring more movement and more false breaks.
| Session window | Common fit | What to plan for |
|---|---|---|
| Asia session | Range work, slower pace | Lower average range on many pairs, watch spread on crosses |
| London session | Trend and breakout setups | Higher volume, faster invalidations, more news impact |
| New York session | Continuation or reversal days | US data spikes, liquidity shifts into the close |
| London and New York overlap | Fast execution traders | Largest moves, higher slippage risk around news |
Write the exact session hours you will trade. Add a rule for news. Example, no new entries 10 minutes before high impact releases.
Personality and Tolerance for Screen Time
Your strategy must fit your attention span and decision speed. If you hate screens, do not build a plan that requires constant monitoring.
- Scalping. Many decisions, short holds, tight stops. You need fast execution and strong focus. You also need rules for spread and slippage.
- Day trading. Fewer trades than scalping, still screen-heavy. You manage positions intraday and close by a cutoff time.
- Swing trading. Few decisions, longer holds. You can trade around work. You still need rules for overnight risk and gaps.
Define your maximum screen time per day. Define your maximum number of trades per day. These constraints reduce overtrading.
Pick one analysis method you can execute fast. If you use levels, document your rules for support and resistance so you mark them the same way every time.
Capital Constraints: Micro Lots, Leverage Realities, and Margin
Your account size sets your position size options. Your broker settings do not change the math.
- Micro lots matter. If you cannot trade micro lots, you may not control risk well. Your stop size will force your risk per trade higher than planned.
- Leverage cuts both ways. Higher leverage increases margin efficiency, not edge. It also makes it easier to oversize.
- Margin is a hard limit. If you run near maximum margin, a normal move can trigger a margin call before your stop gets hit.
Write these numbers in your plan:
- Account size. Your current equity, not your target.
- Minimum tradable size. 0.01 lot, 0.1 lot, or higher.
- Planned risk per trade. A fixed percent or fixed amount.
- Typical stop distance. Based on your system, not wishful thinking.
- Maximum margin usage. Set a cap. Many traders use a low ceiling to avoid forced liquidation.
Reality check. If your minimum lot size and your typical stop create too much dollar risk, you must change something. Reduce size, widen timeframe, or wait until your capital supports your rules.
Your Primary Goal: Income, Skill-Building, or Long-Term Compounding
Different goals require different rules. If you mix them, you will change tactics midstream and break your data.
- Skill-building. You prioritize clean execution and journaling. You trade small. You track process metrics, not monthly payouts.
- Long-term compounding. You prioritize consistency and drawdown control. You accept slow growth and fewer trades.
- Income. You need larger capital and stable performance. You also need a buffer for drawdowns and months with low opportunity.
Write one primary goal. Then write one metric that matches it:
- Skill-building metric. Rule adherence percent per week.
- Compounding metric. Max drawdown and rolling 3-month return.
- Income metric. Average monthly profit over at least 6 to 12 months, after costs.
Lock your goal for a fixed test period. Use at least 30 to 50 trades before you judge results or change rules.
Choose Your Market Focus and Trading Environment
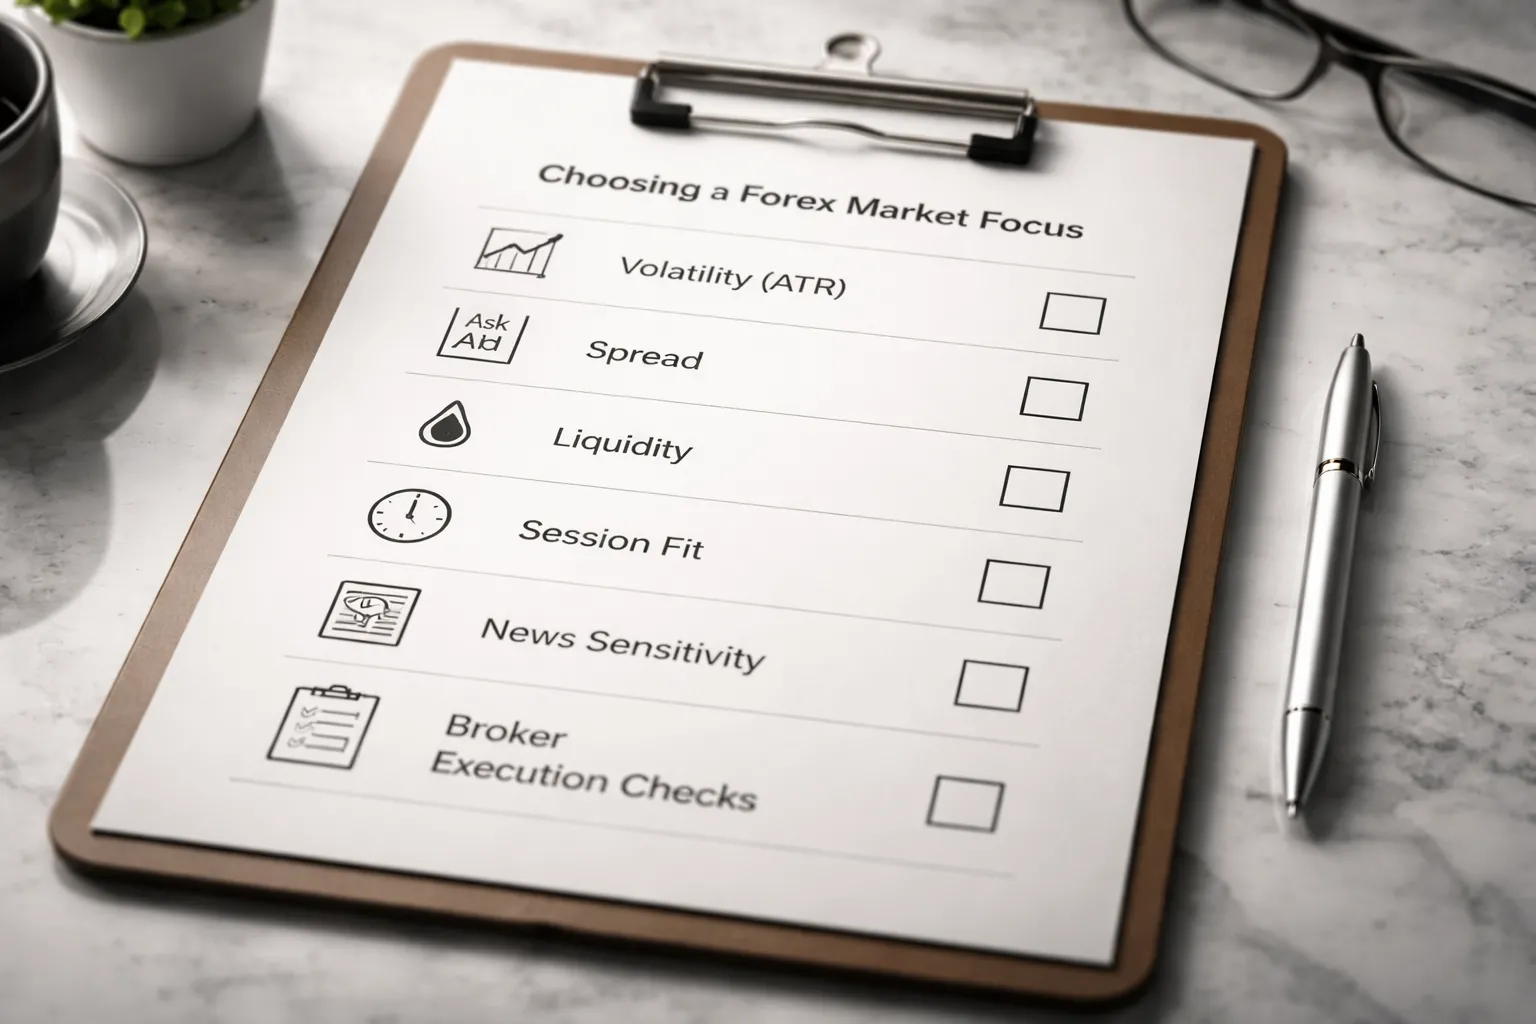
Select Currency Pairs Using Volatility, Spread, and Liquidity
Your plan needs a short watchlist. Start with 3 to 6 pairs. Pick pairs you can trade with low friction and consistent movement.
- Liquidity. Favor pairs with deep order flow. You want stable fills and fewer price gaps. Majors usually win here.
- Spread. Track your broker’s average spread during your trading hours, not the “from 0.0” ad. Record it for two weeks. Avoid pairs where spread spikes at your session open or around rollover.
- Volatility. Match volatility to your stop size and target. Use ATR or average daily range. If a pair’s typical move cannot cover your costs plus your target, remove it. If volatility forces huge stops that break your risk cap, remove it.
Write pair selection rules in your plan. Example: trade only pairs where average spread stays under X pips during your session, and 14-day ATR supports your minimum target at your time frame.
Align Instruments to Your Session and Strategy (Majors vs Crosses)
Trade when your pairs move. Your schedule matters more than your opinions.
- Asian session. JPY, AUD, NZD pairs often show cleaner ranges. Spreads on some crosses can widen, check your broker data.
- London session. EUR and GBP pairs usually see higher volume and stronger trends. Breakouts and momentum systems often perform better here.
- New York session. USD pairs react hard to US data and bond yields. Volatility often peaks around major releases and the equity open.
Majors usually give tighter spreads and better fills. Crosses can trend well but often cost more to trade. If your edge is small, stick to majors. If your system needs larger swings, add one or two crosses after you prove execution and discipline.
If you use multi-timeframe alignment, define which pairs stay clean on your higher time frame and which ones chop. Use one method and keep it consistent. You can expand later. multi-timeframe analysis helps you standardize this filter.
News and Macro Sensitivity: Which Pairs Move on Which Releases
Define what you do around news. No vague rules. Pick one of these modes and write it down, avoid, reduce size, or trade the release with a specific setup.
- USD pairs. High sensitivity to US CPI, NFP, FOMC rate decisions, and Fed guidance. Expect slippage risk on spikes.
- EUR pairs. React to ECB rate decisions, Eurozone CPI, and growth data. Germany data can matter, but ECB days dominate.
- GBP pairs. Often jump on BoE decisions, UK CPI, and UK labor data. Moves can be sharp and fast.
- JPY pairs. Sensitive to risk sentiment, yield moves, and BoJ policy. Intervention headlines can cause gaps.
- AUD pairs. React to RBA decisions, Australian CPI, and China-related headlines. Commodity swings can add volatility.
- NZD pairs. React to RBNZ decisions, NZ CPI, and dairy and risk sentiment.
- CAD pairs. React to oil, BoC decisions, and Canadian jobs data. US data also spills over due to trade ties.
- CHF pairs. React to SNB policy and risk-off flows. Liquidity can thin during stress.
Add a simple event rule. Example: no new trades 15 minutes before and after tier-1 releases for the currencies in your pair. Or cut size by 50 percent and widen stop logic only if your system tests well in news periods.
Broker and Execution Checklist (Spreads, Swaps, Slippage, Regulation)
Your strategy lives or dies on execution. Put this checklist in your plan and verify it before you fund the account.
- Regulation. Use a regulated broker in a jurisdiction you trust. Confirm the legal entity that holds your account.
- Typical spreads. Log average spread by session for your watchlist pairs. Do not rely on marketing minimums.
- Commission and all-in cost. Calculate cost per round trip in pips and in money. Include commission plus spread.
- Swaps and rollover. Check long and short swap rates for each pair. If you hold overnight, swaps can flip expectancy. Note triple-swap day timing.
- Slippage and re-quotes. Track slippage on market orders and stop orders. Use a small live account first and record fills for 30 to 50 trades.
- Execution type. Know what you trade on, market maker, ECN, or hybrid. What matters is your real fill quality and cost.
- Order types. Confirm stop-loss behavior, trailing stops, and limit order rules. Test partial fills and minimum distance limits.
- Platform stability. Track outages, freeze events, and price feed spikes. One bad week can erase months of edge.
- Deposits and withdrawals. Test a withdrawal early. If it fails, stop.
Write your minimum execution standards. Example: if average all-in cost rises above X pips for two weeks, or average slippage exceeds Y pips on stops, you pause and reassess broker, order type, or pair selection.
Define Your Edge: Strategy Components That Must Be Explicit
Market Structure Framework
Your edge must start with a clear view of structure. Pick the regimes you trade. Name them. Define them with rules. If you cannot label the market in 10 seconds, you do nothing.
- Trend. Price makes higher highs and higher lows, or lower highs and lower lows. You trade pullbacks or break-and-retest in the trend direction.
- Range. Price rotates between clear support and resistance. You fade extremes or wait for a clean break.
- Breakout. Price closes beyond a level that capped price multiple times. You trade continuation or the retest, but only with defined volatility.
- Mean reversion. Price stretches away from a reference point and snaps back. You need strict filters or you will fight trends.
Write your framework as if someone else must trade it. Include the inputs you use to classify structure. Examples include swing highs and lows, key levels, session highs and lows, and volatility.
Setup Library, 1 to 3 Trades You Specialize In
Do not run a menu of setups. Build a small library. Track each one like a product.
- Setup name. Short label you will use in your journal.
- Market regime. Trend, range, breakout, or mean reversion.
- Location. The only places the setup is valid, for example prior day high, prior week low, range edge, or pullback to a broken level.
- Signal. What must happen on the chart to prove intent.
- Invalidation. The exact point that proves you are wrong.
Keep it to 1 to 3 setups until you have a meaningful sample size. If you trade ten ideas, you will never know what works.
Timeframes and Confirmation Logic
Pick one method and write it down. You either use top-down alignment or you trade from one chart only. Mixing both creates random decisions.
- Top-down. Higher timeframe defines regime and levels. Trading timeframe defines setup and trigger. Execution timeframe defines entry precision. Example: daily for bias and key levels, 1H for setup, 5M for trigger.
- Single-chart. One timeframe defines everything. You use the same bar size for structure, setup, and trigger. This reduces discretion but needs tighter filters.
Define what “confirmation” means. Use objective checks. Example: trade only if the higher timeframe swing structure matches your direction, and price sits on the correct side of a key level.
Entry Triggers, Exact Conditions That Turn a Setup Into a Trade
A setup is not a trade. Your trigger is the switch. It must be binary.
- Order type. Market, limit, or stop. Specify which one you use for each setup.
- Trigger candle rule. Example: a close beyond a level, a rejection wick plus close back inside a range, or a break of the trigger bar high or low.
- Level rule. Define the exact level, for example prior day high, range boundary, or the last swing high.
- Stop placement rule. Put the stop where the setup is invalid. Avoid “feel” stops. If you use volatility stops, define the input. You can base stops on ATR, see ATR-based stop loss rules.
- Target rule. Define one of these and stick to it, fixed R multiple, next level, or measured move. Keep the rule consistent. For help, see take profit methods and examples.
- Setup present. Yes or no.
- Market regime matches. Yes or no.
- Location valid. Yes or no.
- Trigger condition hit. Yes or no.
- Stop and target defined before entry. Yes or no.
Trade Filters, When You Do NOT Trade
Filters protect your edge. They stop you from forcing trades in bad conditions. Write them as hard rules.
- Volatility filter. No trades when spreads blow out, or when ATR expands beyond your tested range. Define the threshold in pips or % of normal.
- News window. No new positions X minutes before and Y minutes after high-impact releases that affect your pair. Define the list, for example CPI, NFP, rate decisions, press conferences.
- Chop filter. No trades when price sits inside a tight band and keeps flipping direction. Define it. Example: three failed breaks of the same level in one session, or structure with overlapping swings and no clean impulse.
- Session filter. Trade only during the sessions that fit your setup. Define start and end times in your local time.
- Liquidity filter. No trades during rollover, holidays, or thin markets. List the days you avoid.
Put your edge into writing. If a rule is vague, it will break under stress. If it is explicit, you can test it, track it, and improve it.
Risk Management Rules (Non-Negotiables)
Risk per trade and risk per day, week (hard caps)
Set your loss limits first. These rules protect your account from one bad trade and one bad day.
- Risk per trade (RPT): Risk 0.25% to 1.00% of equity per trade. Pick one number and keep it fixed.
- Max loss per day: Stop trading at -2R or -2% equity, whichever comes first.
- Max loss per week: Stop trading at -6R or -6% equity, whichever comes first.
- Daily trade limit: Max 3 trades per day. Less trades means less error stacking.
- After 2 losses in a row: Stop for the day. Review screenshots and execution.
Define what “stop trading” means. No new entries. Manage open trades by plan only. No revenge trades.
Position sizing method (fixed %, ATR stops, volatility sizing)
Position size comes from risk. Never from confidence.
- Choose one sizing model: Fixed percent risk per trade works for most plans. Volatility sizing works if you trade many pairs.
- Formula: Position size = (Account equity x RPT) / (Stop distance in pips x pip value).
- ATR-based stop option: Stop distance = 1.5 x ATR(14) of your entry timeframe. Use a consistent ATR source and session time.
- Volatility cap: If ATR expands above your 30-day median by 50% or more, cut RPT in half or skip the trade.
Record the numbers each trade. Equity, RPT, stop distance, lot size, and the pair. If you cannot compute it in 30 seconds, it is too complex.
Stop-loss placement rules (structural, indicator, time-based)
Your stop must have a reason. It must sit where your trade idea fails.
- Structural stop (primary): Place the stop beyond the swing high or low that defines the setup. Add a buffer of 0.1 x ATR(14) to avoid random spikes.
- Invalidation rule: If price closes beyond the level that invalidates your setup, exit at market, even if the stop has not hit yet.
- Indicator stop (allowed, limited): Use it only if your edge depends on the indicator. Example, exit on an RSI rule you can test. Keep the hard stop in place anyway. If you use RSI signals, keep your settings fixed and document them.
- Time stop: If price does not move at least +0.5R within N candles, exit. Set N by timeframe, for example 6 candles on H1, 3 candles on H4.
Do not widen stops. If you must move a stop, move it closer, and only by a written rule.
Reward-to-risk and expectancy (what matters more than high R:R)
High R:R does not save a weak system. Expectancy does.
- Minimum trade quality: Do not take trades with less than 1.5R planned reward unless your backtest proves positive expectancy at lower R.
- Track these four stats: Win rate, average win in R, average loss in R, and expectancy in R.
- Expectancy formula: E = (Win% x Avg Win R) - (Loss% x Avg Loss R).
- Rule: Trade the plan only if your last 30 trades show E > 0.2R and your max drawdown stays under your weekly loss cap. If not, reduce size or pause.
Use consistent exits. If you change exits every week, your stats mean nothing.
Correlation and portfolio exposure limits across pairs
Many forex pairs move together. If you ignore correlation, you take hidden leverage.
- Hard cap on total open risk: Max 2R total risk across all open trades.
- Single currency cap: Max 1.5R exposure to one currency. Example, EURUSD long and EURJPY long both load EUR risk.
- Highly correlated pair rule: Treat pairs with 20-day correlation above 0.70 as one position. Split risk across them or take only one.
- USD clustering rule: If you already hold two USD-linked positions, you cannot open a third unless total open risk stays under 1R.
Log correlation and currency exposure at entry. If you cannot explain your net exposure in one sentence, cut the trade count.
Entry, Exit, and Trade Management Playbook
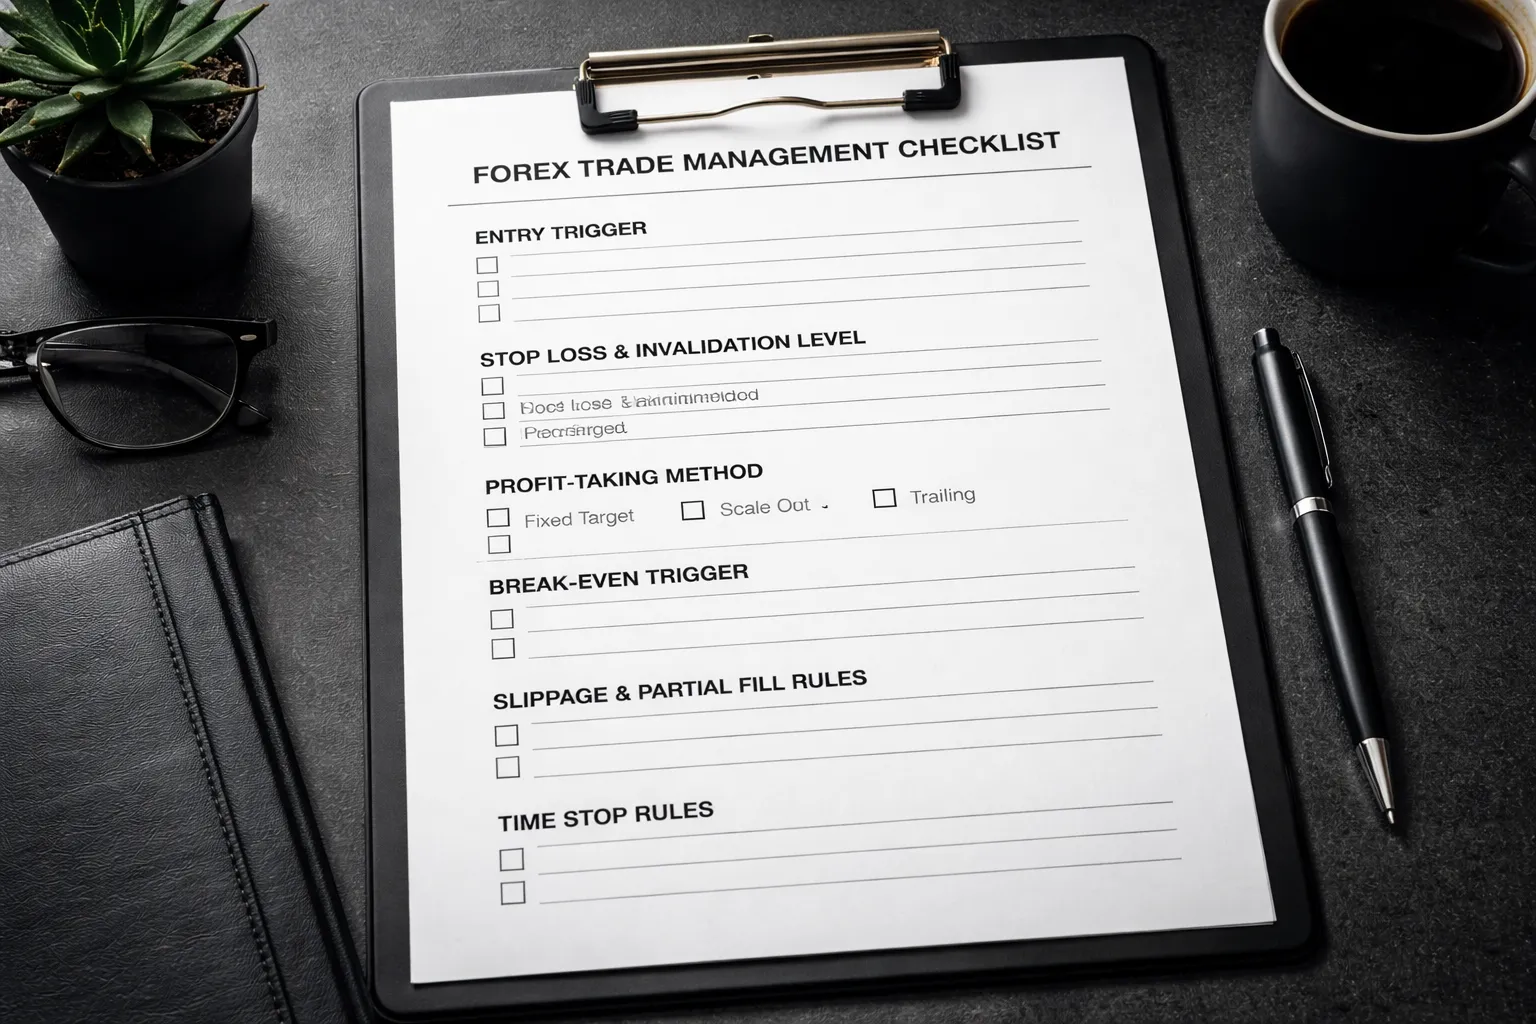
Profit-Taking Options
Write your profit-taking rule before you place the order. Use one method per setup. Mixing methods mid-trade creates random outcomes.
- Fixed target. Set a take-profit at a measured level. Common choices: 1R, 2R, prior swing high or low, daily ATR multiple. Use fixed targets when price tends to mean revert at clear levels.
- Scale out. Take partial profits at predefined R points. Example: take 50% at +1R, move stop to reduce risk, hold the rest to +2R or a final level. Scaling smooths equity curves but can lower average R on strong trends.
- Trailing logic. Trail behind structure or volatility. Keep the rule mechanical. Examples:
- Structure trail: move stop below higher lows for longs, above lower highs for shorts, but only after a candle closes that confirms the new swing.
- ATR trail: stop equals entry minus 2x ATR(14) for longs, plus 2x ATR(14) for shorts, recalculated each day.
- MA trail: exit on a close back through a moving average you defined in the setup, keep it consistent with your system. If you use MAs, match the timeframe to the trade.
Document which profit method fits which setup. Track average R, win rate, and drawdown by method. Cut the weakest method after a meaningful sample.
Break-Even Rules, and When They Hurt Performance
Break-even feels safe. It often kills your expectancy by turning winners into scratches.
- Use break-even only after the trade proves itself. Require a close beyond a trigger, not a quick spike. Triggers you can use: +1R reached, a structure break holds, or price closes beyond your entry zone.
- Do not move to break-even just because you feel exposed. That turns your stop into noise-sensitive placement.
- Avoid instant break-even on tight intraday setups. Spreads and minor pullbacks will take you out before the real move starts.
- Preferred compromise. Reduce risk without forcing a scratch. Example: when price hits +1R, move stop to -0.25R or to the last minor swing, then trail after +2R.
Backtest your break-even rule as its own variable. Compare average R per trade with and without break-even. Keep the version with higher expectancy, not the one that feels better.
Partial Fills, Slippage, and Missed Entries
You need predefined responses. You cannot improvise during fast markets.
- Partial fills. If you receive less size than planned, recalculate risk on the filled size only. Do not add size later unless your plan allows a second entry and the stop location stays valid.
- Slippage. If slippage increases your risk above your max per-trade limit, reduce position size or cancel the trade. Never widen the stop to keep size, that breaks your R plan.
- Missed entries. Use one of these rules, then follow it every time:
- Skip the trade if price moves more than X pips or 0.25R from your intended entry.
- Allow one retest entry only if price returns to the original entry zone and your invalidation level stays unchanged.
- Allow a market entry only if the new stop still gives at least your minimum R:R and your total open risk stays within limits.
- News and spreads. If spreads exceed your normal spread by a preset multiple, do not enter. Log it as a “spread filter” skip, not as a missed trade.
Place the order type that matches the setup and volatility. If you need a refresher, use this guide on market vs limit vs stop orders.
Invalidation Signals
Invalidation is what proves your thesis wrong. Define it as a price event, not a feeling.
- Hard invalidation. Price closes beyond your invalidation level on the timeframe you trade. Example: a daily close below the swing low you used for a long.
- Structure failure. The market prints the opposite structure that breaks your setup. Example: for a long, a lower low and lower high after your entry trigger.
- Volatility regime shift. ATR expands and price starts crossing your reference levels without follow-through. If your strategy relies on orderly swings, exit when conditions stop matching the strategy’s edge.
- Correlation thesis breaks. If you entered because of a relative move across correlated pairs, exit if the relative move mean reverts while price stalls. Log it as a thesis failure, not as bad luck.
Keep invalidation binary. Either it happened or it did not. If you cannot point to the exact candle that invalidated the trade, your rule is too vague.
Time Stops
Some trades fail by doing nothing. Time stops protect capital and attention.
- Set a maximum time in trade. Base it on your timeframe. Example: 3 to 5 candles on the entry timeframe for momentum setups, 10 to 20 candles for swing setups.
- Set a “no progress” rule. Exit if price does not reach +0.5R by X candles, or if it stays inside the entry zone after X candles.
- Set a “failed follow-through” rule. If price breaks the trigger level but closes back inside the range within Y candles, exit.
Time stops reduce slow losses and free risk for better setups. Track them separately. If time-stop exits often precede full moves in your direction, your entry trigger is late or your stop is too tight.
Pre-Trade Checklist and Daily Routine (Execution Layer)
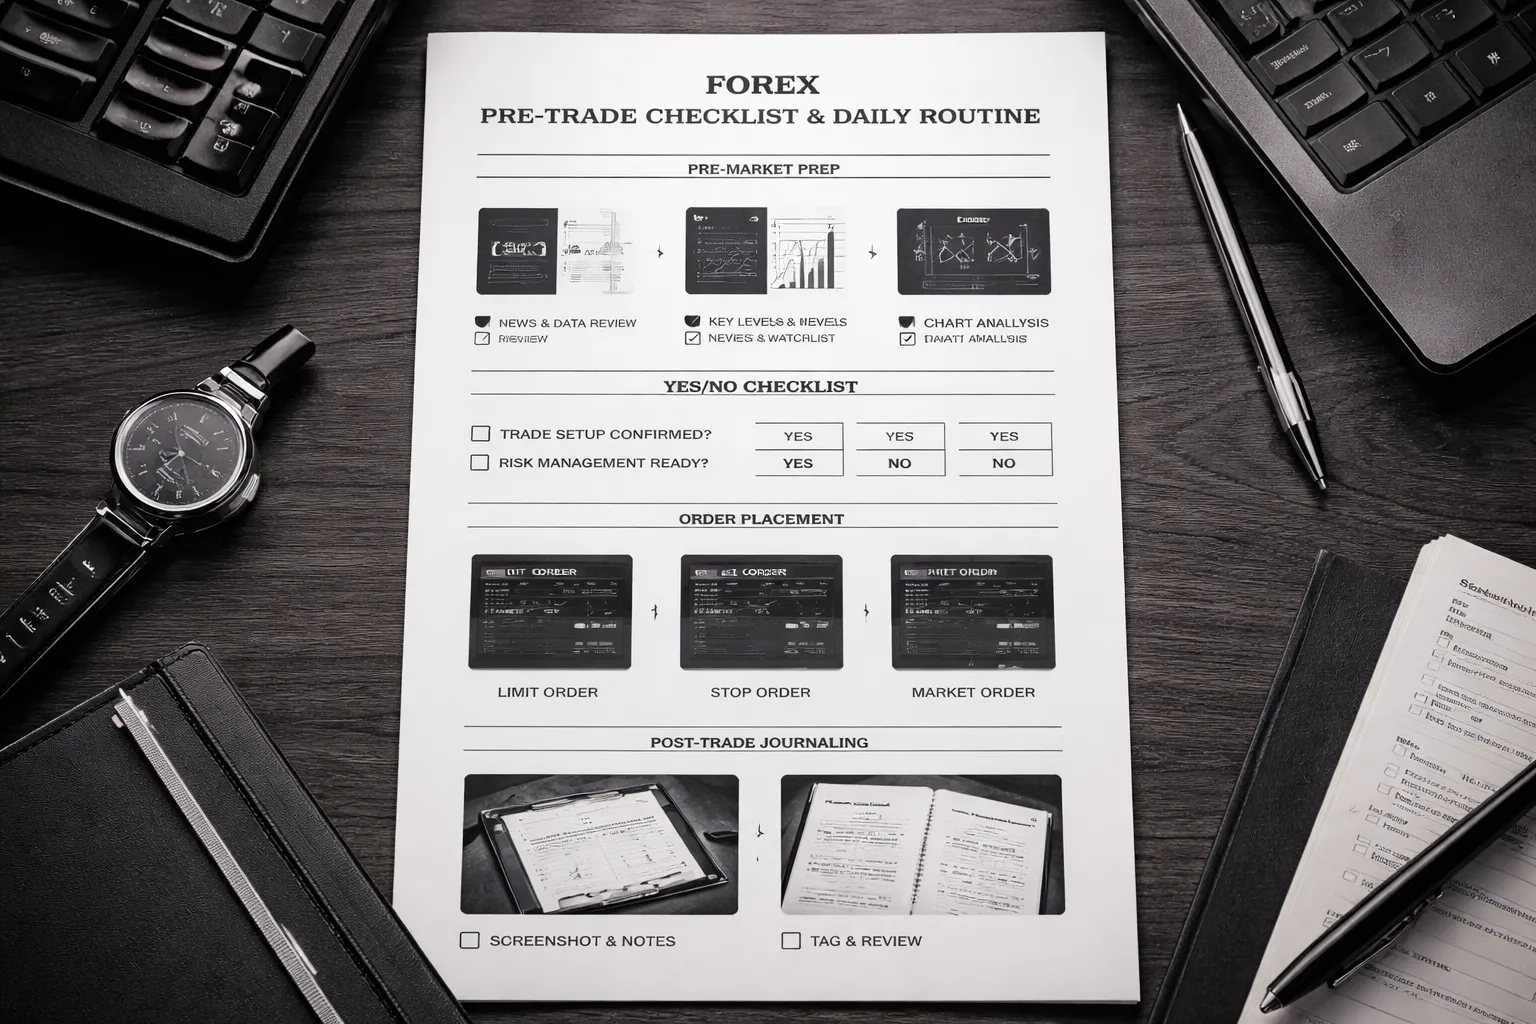
Pre-Market Prep, Levels, Bias, News
Start before you look for entries. You want a plan, then a setup.
- Pick your sessions. Define your trading window. Outside it, you do not trade.
- Mark levels. Prior day high and low, current day open, weekly high and low, clear swing highs and lows, supply and demand zones you actually trade.
- Define market state. Trend, range, or transition. Write one line. Example, “EU in range between 1.0820 and 1.0880.”
- Set directional bias. Bullish, bearish, or neutral. Neutral means you trade only clean range rules.
- Set your invalidation point. The price level that kills your bias. If it breaks, you stop looking for that idea.
- Scan scheduled news. Check the calendar for your pairs. Note time, currency, expected impact.
- News rule. No new trades X minutes before and after red events. Keep the same X every day so you can measure results.
- Build a short watchlist. 3 to 6 pairs. If you watch more, you force trades.
Yes or No Checklist to Block Impulsive Trades
You place a trade only if every item is “Yes.” If one item is “No,” you pass. No edits. No exceptions.
- Setup: Is this one of your tagged setups, with the same trigger rules?
- Location: Is price at your planned level or zone?
- Market state: Does the setup match trend or range rules for today?
- Trigger: Did price hit your trigger level, on your execution timeframe?
- Stop: Is the stop at your predefined invalidation, not a random distance?
- Position size: Does size match your fixed risk per trade?
- RR: Does the first target give your minimum R multiple?
- Time stop: Is your time-stop rule defined for this setup?
- News: Is there no scheduled high impact news inside your no-trade window?
- Frequency: Are you still within your daily trade limit?
- Execution: Can you place the order without rushing or guessing?
If you struggle with trade limits, read how to avoid overtrading and add one rule to your checklist.
Order Placement Steps That Reduce Errors
Execution errors look like bad strategy. Fix them with a fixed order script.
- Step 1, choose the order type. Use the type that matches your trigger.
- Limit order. Use when you want a better price at a level and you accept missing the trade. Best for pullbacks into zones.
- Stop order. Use when you want confirmation beyond a trigger level. Best for breakouts with follow-through rules.
- Market order. Use only when your plan requires immediate fill. If you use market orders, log slippage in pips.
- Step 2, set the stop loss first. Place it at invalidation. Do not “give it room” after you see the spread.
- Step 3, set position size from risk. Risk amount is fixed. Size is the variable.
- Step 4, set take profit levels. At least TP1 for your minimum R. Add TP2 only if your plan defines it.
- Step 5, set alerts. One alert at entry zone, one at invalidation, one near TP1.
- Step 6, check the ticket. Pair, direction, size, stop, target, order type. Read it left to right before you click.
- Step 7, record the plan. Write one line before entry. Setup name, entry, stop, targets, time stop, reason.
Post-Trade Routine, Screenshot, Notes, Tagging
Log every trade the same way. You want clean data, not stories.
- Screenshot 1, entry. Capture the chart with entry, stop, targets, and the level that mattered.
- Screenshot 2, exit. Capture the exit candle and the reason you exited.
- Tag the setup. Use a short tag list, 5 to 10 tags max. Example, “RangeFade,” “Breakout,” “Pullback,” “News,” “TimeStop.”
- Record execution stats. Planned entry vs filled entry, slippage in pips, spread at entry, stop distance in pips, R result.
- Record rule adherence. Yes or No. If “No,” name the broken rule, one line.
- Write a fix. One action you can repeat. Example, “Place stop order only after candle close.”
- End-of-day review. Count trades, total R, average R, win rate, best setup, worst setup, errors. Errors get their own total.
Separate strategy performance from execution performance. A good setup with bad execution needs process changes, not a new strategy.
Backtesting, Forward Testing, and Validation
Error: Invalid type for 'messages[1].content': expected one of a string or array of objects, but got a boolean instead.Trading Journal and Performance Review System
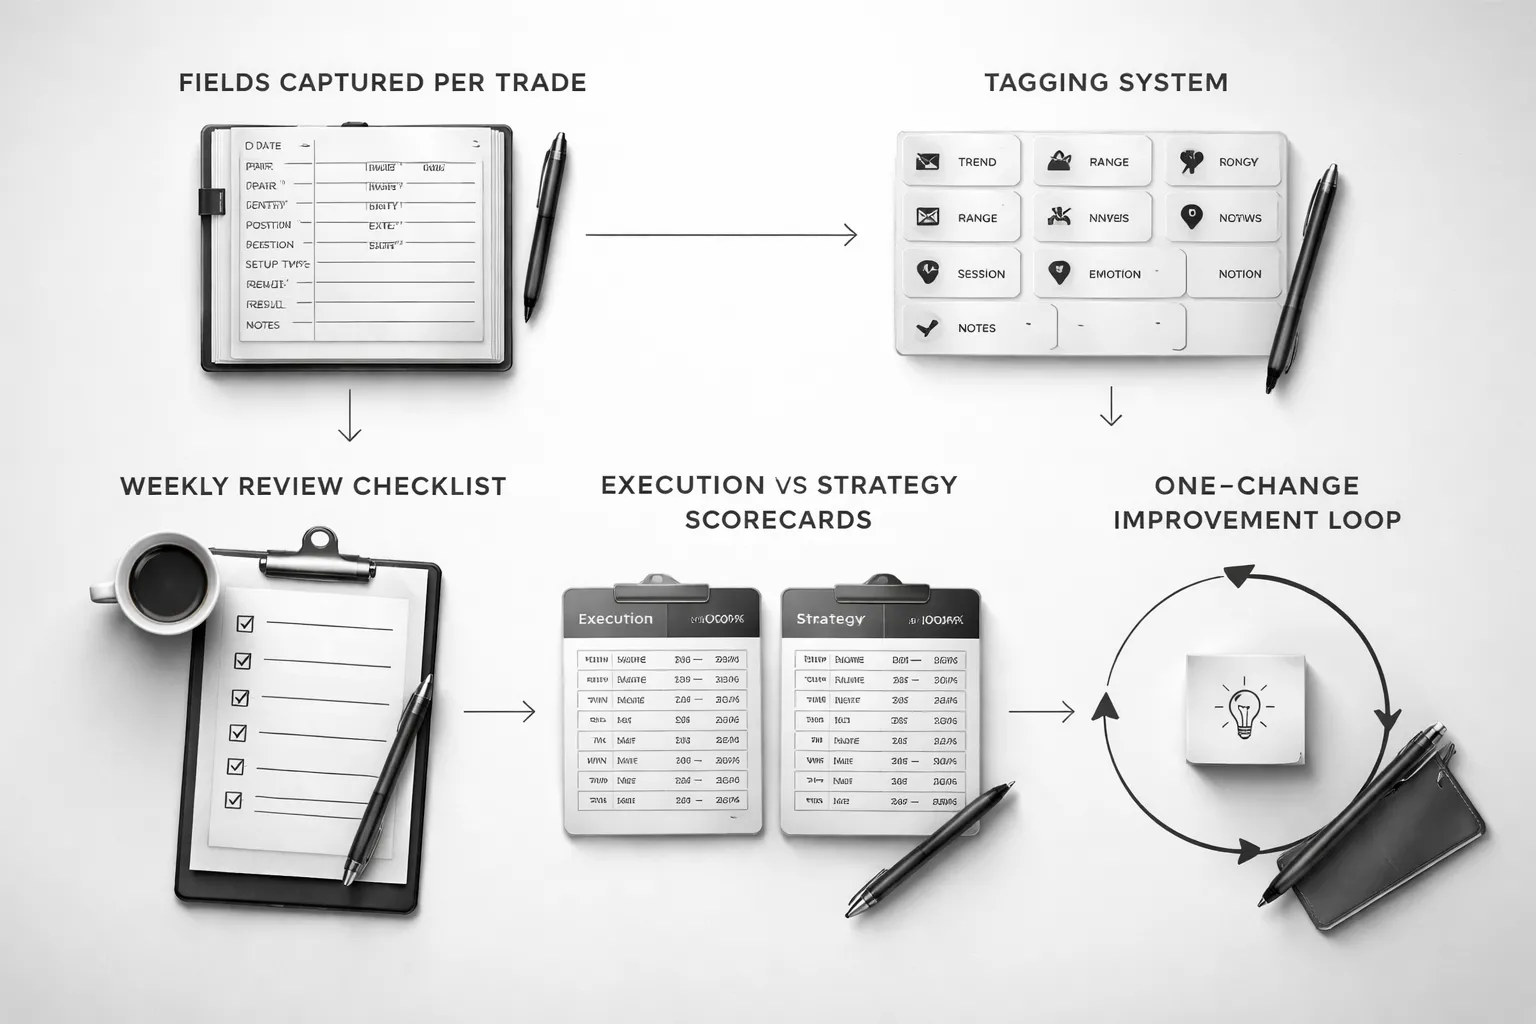
What to Record Per Trade
Your journal is a dataset. If you skip fields, you corrupt it. Record the same items every time.
- Trade ID: unique number, date, session, broker, account.
- Market: pair, timeframe, spread at entry, news risk on the calendar.
- Setup context: trend state, key levels, catalyst, what you saw.
- Entry plan: entry type, trigger, limit or market, stop placement logic, take profit logic.
- Risk: account size, risk per trade in %, position size, planned R multiple, max loss in $.
- Execution: actual entry, stop, take profit, slippage, partials, scale in or out.
- Management: what you changed after entry, when, and why, include rule reference.
- Outcome: result in R, result in $, holding time, max adverse excursion, max favorable excursion.
- Rule adherence: list each rule as pass or fail, add one sentence per fail.
- Emotions: before, during, after. Use a 1 to 5 scale for fear, greed, FOMO, frustration.
- Notes: one mistake, one good decision, one lesson.
- Screenshots: pre trade chart, entry moment, exit moment, mark levels and indicators used.
Tagging and Categorizing Trades to Find Patterns
Tags turn a journal into a filtering tool. Keep tags fixed. Add new tags only after a week of need.
- Strategy tag: strategy name and version, example: Pullback V1.
- Setup tag: breakout, pullback, range fade, news trade.
- Trend tag: trend, range, transition.
- Time tag: Asia, London, New York, overlap.
- Quality tag: A, B, C based on your checklist score.
- Mistake tag: early entry, late entry, stop moved, oversize, revenge, missed trade.
- Market condition tag: high volatility, low volatility, widened spreads.
- Exit tag: target hit, stop hit, time stop, discretionary exit, trailing stop.
Use tags to answer specific questions. Filter by one variable at a time, then stack filters. Example, pullback trades in London, A quality only.
If you trade pullbacks, align your tags with your rules. Use the same wording you use in your checklist. For entries, keep a reference to your pullback trading strategy rules.
Weekly Review Agenda: Keep, Tweak, Remove
Do your review on the same day each week. Use a fixed agenda. Avoid improvising.
- Step 1, data hygiene: missing fields, missing screenshots, wrong tags. Fix them.
- Step 2, results snapshot: total R, win rate, average win R, average loss R, expectancy, max drawdown in R.
- Step 3, rule adherence: count each rule break, rank by frequency and by cost in R.
- Step 4, top and bottom buckets: best 10 trades and worst 10 trades. Compare context, tags, and execution.
- Step 5, keep: rules or filters that show stable expectancy and low execution error.
- Step 6, tweak: one variable with a clear test plan, example: tighten entry trigger definition, change time window, adjust stop rule.
- Step 7, remove: setups that lose money after fees, or setups that require perfect execution you cannot repeat.
- Step 8, next week constraints: max trades per day, no trade conditions, required checklist score.
Measure Execution Quality vs Strategy Performance
Separate your skill from your system. Use two scorecards. Do not mix them.
Scorecard 1, Execution Quality
Scorecard 2, Strategy Performance
If execution quality stays high and the strategy still loses, the system needs work. If the strategy performs on A trades but fails on C trades, you have an execution problem.
Create an Improvement Loop With One Change at a Time
Do not rebuild your plan each week. Run a controlled loop. One change. One week. One metric.
- Pick one problem: choose the rule break that costs the most R.
- Define one change: write a single sentence rule, example: no trades in the first 5 minutes of London open.
- Set a success metric: reduce that mistake from X to Y, or raise A grade trades from X% to Y%.
- Apply for one week: no other edits.
- Review: compare before and after with the same tags and the same scorecards.
- Decide: keep if it improves execution or expectancy, remove if it adds friction with no gain.
- Document version: update your plan version and journal template version.
Forex Trading Plan Template (Copy/Paste)
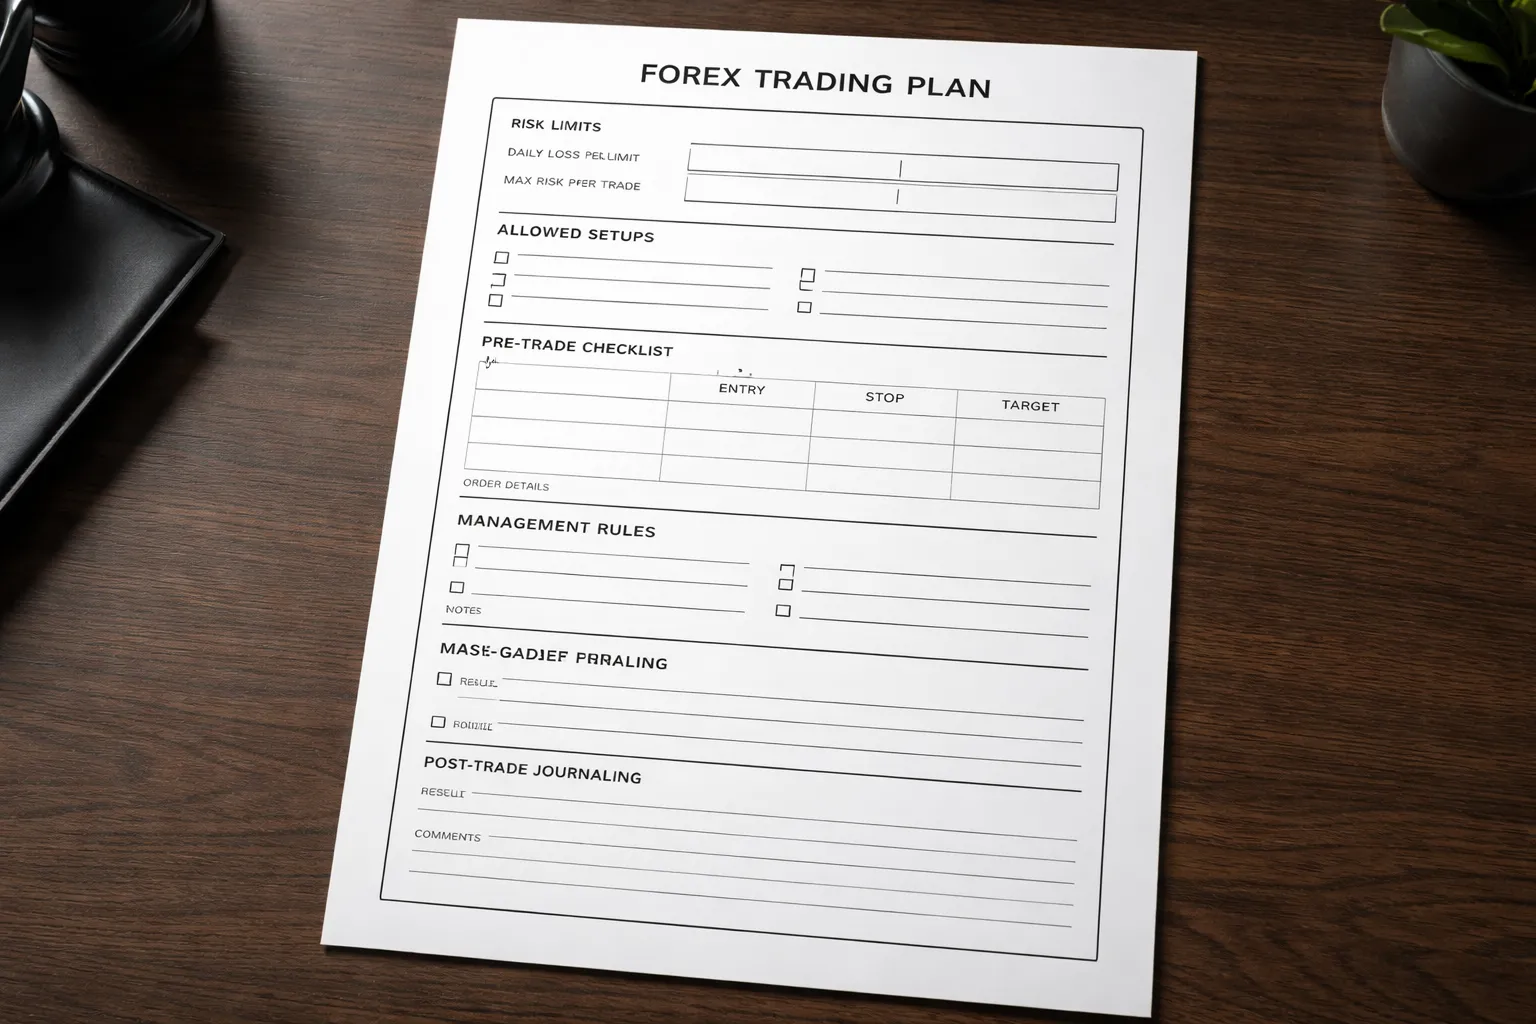
One-Page Quick Plan (Daily Execution)
- Plan version: v____ (date ____)
- Market: ____ (ex: EURUSD, GBPUSD, USDJPY)
- Session: ____ (ex: London open to London mid)
- Timeframe for entries: ____ (ex: H1, H4)
- Timeframe for bias: ____ (ex: D1)
- Max trades per day: ____
- Daily loss limit: ____R or ____% (stop trading if hit)
- Risk per trade: ____% or ____R
- Minimum R:R to take a trade: ____ (ex: 1:2)
- Setup types allowed today:
- Setup A: ____
- Setup B: ____
- Setup C: ____
- Before you enter, confirm:
- Bias aligned with your higher timeframe rules: Yes or No
- Entry trigger printed per your rules: Yes or No
- Stop level is valid and logical: Yes or No
- Target level is valid and logical: Yes or No
- Position size matches risk rule: Yes or No
- News filter passed: Yes or No
- Spread and execution conditions acceptable: Yes or No
- Order template:
- Entry: ____
- Stop loss: ____
- Take profit 1: ____ (optional)
- Take profit final: ____
- Planned R multiple at TP final: ____R
- Invalidation condition: ____
- Management rules:
- Move stop to break-even: never or at ____R or after ____ condition
- Partial take profit: none or ____% at ____R
- Trailing stop: none or method ____
- Hard rules you will not break today: ____
- Post-trade:
- Screenshot before, during, after: Yes or No
- Tag the trade: Setup __, Grade __, Mistake __
- Score execution (0 to 10): ____
- Write one sentence: what you did right, what you fix next time
Full Forex Trading Plan Template (Strategy Document Prompts)
- 1) Identity and constraints
- Trader type: scalper, day trader, swing trader
- Markets you trade: ____
- Trading window: days ____; hours ____ (time zone ____)
- Tools you use: platform __; broker __; charting __
- What you will not trade: ____ (ex: illiquid pairs, high spreads, news spikes)
- 2) Objectives and success metrics
- Main goal (process): ____ (ex: 90% rule compliance)
- Main goal (performance): ____ (ex: +X R per month over 30 trades)
- Metrics you track weekly: rule breaks, A-grade %, expectancy, average R, max drawdown
- Minimum sample size before you judge changes: ____ trades or ____ weeks
- 3) Risk framework (non-negotiable)
- Account size: $____
- Risk per trade: ____% (or fixed $____)
- Max open risk (all positions combined): ____%
- Daily stop: ____R or ____%
- Weekly stop: ____R or ____%
- Max consecutive losses before you stop: ____
- Position sizing method: fixed fractional or fixed $ risk
- Hard rule: you place the stop first, then size the position
- Link your exit rules to your risk plan, see stop loss vs take profit best practices
- 4) Market selection rules
- Pairs allowed: ____
- Spread limit: ____ pips
- Volatility filter: ATR(____) must be between ____ and ____
- Correlation rule: max ____ highly correlated positions at once
- News rule: do not open new trades within ____ minutes of red news for the pair
- 5) Your edge (setup definitions)
- Setup A name: ____
- Market condition: trend, range, breakout, pullback
- Bias rules (higher timeframe): ____
- Entry trigger (lower timeframe): ____
- Stop placement rule: ____
- Target rule: fixed R, structure-based, or volatility-based
- Minimum quality filter: ____ (ex: must be at key level; must have clean swing points)
- Invalidation: what proves the idea wrong: ____
- Examples to screenshot and save: 5 winners, 5 losers, 5 no-trades
- 6) Trade execution rules
- Order types you allow: market, limit, stop
- Slippage rule: if slippage > ____ pips, cancel or re-evaluate
- Max time in trade: ____ (optional)
- Re-entry rule: allowed only if ____ condition prints
- No revenge trades rule: after a loss, wait ____ minutes and re-check your checklist
- 7) Trade management rules
- When you reduce risk: ____ (ex: after 1R in profit, trail behind last swing)
- Partial profits: none or ____% at ____R
- When you add to a position: never or only when ____ condition prints
- When you exit early: only if ____ (ex: invalidation, major news, rule-based stop)
- 8) Routine
- Pre-market (10 to 20 minutes): news check, mark levels, write bias, set alerts
- During market: only execute A-grade setups, log planned trades before entry
- Post-market (10 minutes): journal, screenshots, score execution
- Weekly review (30 to 60 minutes): stats, top mistakes, one change to test next week
- 9) Journal and review system
- Trade grading scale: A, B, C based on checklist score
- Mistake tags: early entry, late entry, moved stop, oversized, overtraded, ignored news
- Weekly report fields: total trades, A-grade %, expectancy, best setup, worst mistake
- Change log: plan version, what changed, start date, end date, result
Example Filled-Out Plan (Hypothetical Swing Trader)
- Trader type: Swing
- Markets: EURUSD, GBPUSD
- Time commitment: 30 minutes pre-market, 10 minutes end of day
- Bias timeframe: D1
- Entry timeframe: H4
- Risk per trade: 0.5% of account
- Max open risk: 1.5% (max 3 positions at 0.5%)
- Weekly stop: 3R, stop trading for the week if hit
- Minimum R:R: 1:2 to first target, 1:3 preferred
- News rule: no new entries within 60 minutes of red news for EUR or USD or GBP
- Setup A: D1 trend pullback, H4 break and retest
- Market condition: D1 trend confirmed by higher highs and higher lows, or lower highs and lower lows
- Bias: trade only in the D1 trend direction
- Entry trigger: H4 close beyond level, then limit order on retest zone
- Stop: beyond H4 swing point plus buffer of ____ pips
- Target: TP1 at 2R, TP final at 3R or next D1 level, whichever comes first
- Invalidation: D1 structure break against the trend, or H4 closes beyond stop level zone
- Management:
- At +2R: take 50% off, move stop to entry
- Remainder: trail stop behind the last H4 swing after each new swing forms
- No adding to position
- Daily routine:
- Pre-market: mark D1 levels, write one-sentence bias per pair, set H4 alerts
- Execution: place orders only after H4 close, no mid-candle entries
- Post-market: screenshot, journal, grade the trade
- Weekly review metric: raise A-grade trades from 55% to 70% over 4 weeks
- One rule in focus this week: no mid-candle entries, only H4 closes
Printable Checklist and Journaling Fields
- Pre-trade checklist (print this)
- Date, time, pair: ____
- Plan version: ____
- Setup name: ____
- Higher timeframe bias matches rules: Yes or No
- Key level identified: Yes or No
- Entry trigger printed: Yes or No
- Stop location is rule-based: Yes or No
- Target location is rule-based: Yes or No
- R:R meets minimum: Yes or No
- Risk per trade correct: Yes or No
- News filter passed: Yes or No
- Spread acceptable: Yes or No
- Trade grade before entry: A, B, C
- If not A, you skip: Yes
- Trade journal fields (copy/paste)
- Trade ID: ____
- Date opened, date closed: ____
- Pair, direction: ____
- Timeframes used: bias ____; entry ____
- Setup: ____
- Entry price, stop price, target price: ____
- Stop size (pips), position size (lots), risk ($ and %): ____
- Planned R multiple: ____R
- Result (R): ____R
- Reason for exit: TP, SL, early exit rule, manual error
- Execution score (0 to 10): ____
- Rule breaks (if any): ____
- Mistake tags: ____
- Screenshot links: before ____; during ____; after ____
- One lesson: ____
- One fix to test next week: ____
- Weekly review fields
- Week start, end: ____
- Total trades: ____
- A-grade %: ____
- Expectancy (R per trade): ____
- Best setup: ____
- Top 1 mistake: ____
- Change for next week (one only): ____
- Plan version update: v____ to v____
Common Mistakes When Building a Forex Trading Plan
Writing vague rules that can’t be followed under pressure
Vague rules fail when price moves fast. Your brain fills gaps with excuses. You skip trades, chase trades, or widen stops. Then you cannot review results because you cannot tell what you followed.
- Vague: “Trade breakouts.”
- Specific: “London session only. Mark Asian range. Enter on a 15-minute close above the range high. Stop 1R below the breakout candle low. One attempt per pair per day.”
- Vague: “Use good risk management.”
- Specific: “Risk 0.5R per trade. Max 2R loss per day. Stop trading after 2 losses.”
Write rules that a stranger can execute. If you cannot measure it, you cannot enforce it.
Overcomplicating indicators and adding conflicting signals
More indicators do not mean more edge. They often measure the same thing. You end up with mixed signals and late entries. You also curve fit your plan to past charts.
- Limit your decision inputs to one setup trigger and one filter.
- Define priority. If signals conflict, you do nothing.
- Remove indicators that do not change your actions.
If you need indicators, keep them simple and rule-based. If you use RSI, define the exact signal and timeframe and stick to it. Do not change settings after a losing week.
Ignoring costs: spreads, swaps, commissions, and slippage
Costs turn a small edge into a losing system. This hits hardest on short targets, tight stops, and high frequency styles.
| Cost | Where it hits | What to write in your plan |
|---|---|---|
| Spread | Every entry and exit | Trade only pairs where average spread stays under your limit during your session |
| Commission | Per lot traded | Include commission in your R calculations and expectancy |
| Swap | Overnight holds | Rules for holding past rollover, plus a swap check before entry |
| Slippage | News, low liquidity, stops | No trading X minutes before red news, use limit orders when possible, add slippage assumption in tests |
Backtest with realistic costs. If you have not done this, do it before scaling size. Use a process like how to backtest a Forex strategy.
Changing rules mid-trade or mid-week without a review cycle
Rule changes during a trade hide bad decisions. Rule changes mid-week poison your data. You cannot tell if the plan works or if you just got lucky.
- Lock your plan for the week. Trade the same rules for the full sample.
- Allow only pre-written exceptions, like platform outage or major news you listed in advance.
- Record every deviation in your journal and tag it as “plan break.”
Make changes only in your weekly review. Update one variable at a time. Track plan versions, v1 to v2, so you know what caused the shift in results.
Risking too much early and never letting the edge play out
High risk per trade creates large drawdowns. Then you cut size, stop trading, or change systems. Your edge needs enough trades to show up. Big swings block that.
- Start with small fixed risk. Keep it stable across trades.
- Use a max daily loss and max weekly loss. Stop when you hit it.
- Increase risk only after a minimum sample, with stable execution and stable expectancy.
Focus on survival first. Your goal is to stay in the game long enough to collect clean data and improve execution.
Adapting Your Plan Over Time (Without Self-Sabotage)
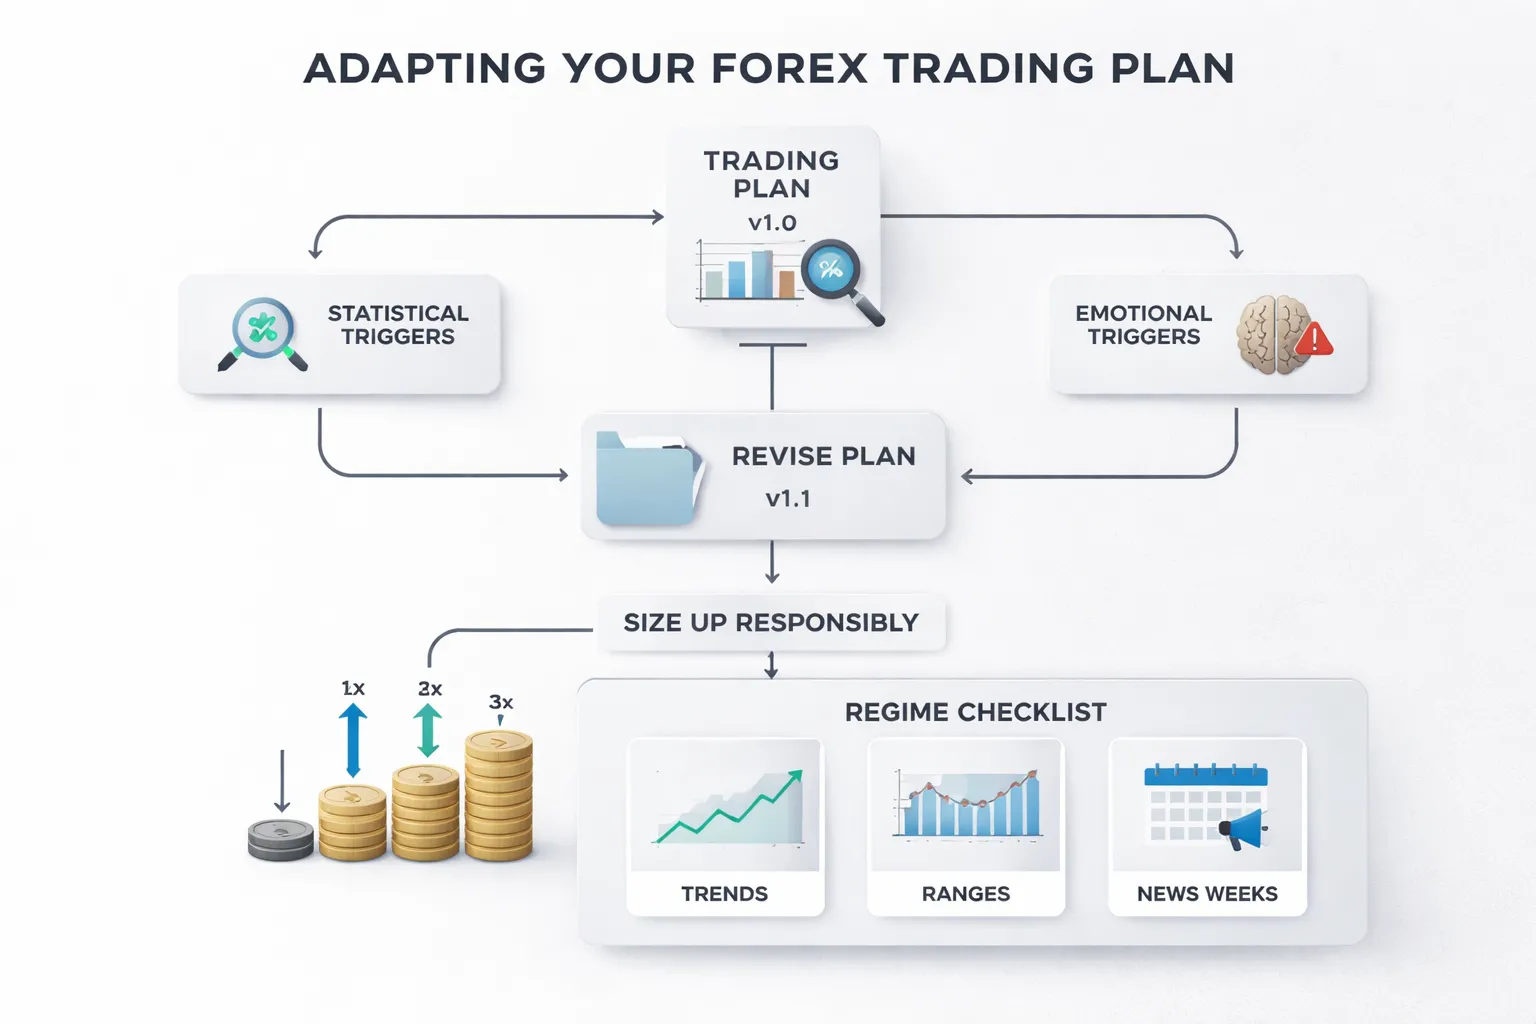
When to iterate, statistical triggers vs emotional triggers
Change your plan only when the data says you should. Do not change it to relieve stress.
- Statistical triggers. Iterate after a minimum sample of trades with the same rules and risk. Use your journal and trade log. Look for a clear shift in expectancy, error rate, or drawdown behavior.
- Emotional triggers. Do not iterate after a loss streak, a missed move, a social media idea, or a strong opinion about the market. Those signals push you into rule hopping.
Use a simple rule. No rule changes during a drawdown. Finish the sample first. If you feel pressure to change, reduce size. Keep the rules.
If emotions keep driving decisions, use a pre-trade checklist and a hard stop routine. This helps you stay consistent and protects your edge. For more on execution control, read these forex trading psychology tips.
Version control, documenting changes and test results
Run your plan like a system. Each change creates a new version.
- Give every plan a name. Example, Plan v1.0, v1.1.
- Change one variable at a time. If you change entries and exits together, you learn nothing.
- Write the reason for the change in one sentence. Tie it to a measured problem.
- Set the test window in advance. Example, next 30 trades that meet criteria.
- Define success metrics before you start. Example, expectancy per trade, win rate, average R, max drawdown, mistake rate.
- Tag every trade in your log with the plan version.
| Log item | What to record |
|---|---|
| Version | v1.0, v1.1, v2.0 |
| Change | One rule, written as a before and after |
| Reason | Problem tied to data, not feelings |
| Test size | Minimum number of valid trades |
| Metrics | Expectancy, drawdown, win rate, avg win, avg loss, error rate |
| Result | Keep, revert, or retest |
Do not judge a change by P and L alone. Judge it by process quality plus results over a fixed sample.
Scaling position size responsibly after consistency
Scale only after you prove two things. You follow the rules. The strategy has positive expectancy in your hands.
- Hold risk per trade constant until you complete your minimum sample with stable execution.
- Increase risk in small steps. Use a fixed increment. Keep it boring.
- After each increase, run a new sample before the next increase.
- If drawdown expands beyond your normal range, cut risk back to the prior level.
- Do not increase size to win back losses. That is revenge trading with math.
Use a simple scaling rule. Increase risk only after a clean sample and a contained drawdown. If you break rules, you freeze size. If you keep breaking rules, you reduce size.
Planning for different regimes, trends, ranges, high-impact news weeks
Your plan needs a regime layer. You do not need new strategies. You need clear filters and clear expectations.
- Trend regimes. Favor trend setups. Avoid countertrend trades. Let winners run to your target logic. Reduce overtrading.
- Range regimes. Tighten your expectations. Take faster profits. Avoid breakout entries unless you have a specific breakout rule with confirmation and a defined failure point.
- High-impact news weeks. Define your risk policy in advance. You can skip trading during scheduled releases, cut size, widen filters, or trade only after the event. Pick one rule set and stick to it.
Add a simple regime tag to each trade, trend, range, news. Track performance by tag. If one regime loses money over a real sample, reduce exposure in that regime or require higher quality setups.
Risk, Compliance, and Safety Notes (E-E-A-T Additions)
Understand leverage and margin calls
Leverage lets you control a larger position with a smaller deposit. It increases gains and losses.
Your broker sets a margin requirement. This is the minimum equity you must keep to hold the position.
- Used margin. The margin tied up in open trades.
- Free margin. Equity minus used margin. This is your buffer.
- Margin level. Equity divided by used margin, shown as a percent. When it drops, risk rises fast.
A margin call means your buffer is too small. Your broker can close trades if your margin level hits their stop-out threshold. You lose control of the exit.
Plan rules that prevent forced liquidation.
- Cap total open risk across all positions, not per trade only.
- Reduce size when volatility expands, spreads widen, or liquidity drops.
- Avoid holding large leveraged positions into major scheduled news if your edge depends on tight stops.
- Keep a cash buffer. Do not run near maximum margin usage.
Keep capital separate and set loss limits you can sustain
Use a dedicated trading account. Do not mix bills, savings, and trading funds.
Define three loss limits. Write them in your plan. Enforce them with platform alerts or hard stops.
- Per-trade loss limit. Your maximum planned loss if the stop hits.
- Daily or weekly drawdown limit. Stop trading when you hit it. Review, then reset on schedule.
- Max account drawdown limit. If reached, you stop trading and reduce risk or go to demo until performance returns.
Choose limits you can follow under stress. If you break rules when down, your limits are too wide, or your position sizes are too large.
Document your position sizing method and inputs. If you use indicator-based stops, keep the logic consistent. For example, if you size around momentum signals, keep the indicator settings fixed during a test window, see MACD indicator.
Choose reputable data sources and keep records
Your plan needs clean inputs. Bad data creates fake confidence.
- Use broker tick data for execution review, spreads, and slippage.
- Use an established calendar for scheduled economic releases.
- Cross-check price spikes on a second source before you label them as market behavior.
Keep records that you can audit. Store them in a spreadsheet or journal with timestamps.
- Trade date, pair, session, regime tag, setup name.
- Entry, stop, target, position size, planned risk in money and percent.
- Order type, fill price, spread at entry, slippage, swap, commissions.
- Reason for exit, rule followed or broken, screenshot link.
Track performance by regime tag and setup. Use a minimum sample before you change rules. Small samples create random results.
Risk reminder and compliance note
Forex and CFDs involve substantial risk. Many retail accounts lose money. Leverage can cause rapid losses.
No trading plan guarantees profits. Past performance does not predict future results.
Use risk capital only. If you cannot afford the loss, you cannot afford the trade.
Follow the rules and laws that apply in your country. Use a regulated broker where possible. Read product disclosures and margin policies before you trade.
FAQ
What is a forex trading plan?
A forex trading plan is a written set of rules for what you trade, when you enter, where you exit, and how much you risk. It includes your strategy, risk limits, routine, and review process. You use it to reduce random decisions and stay consistent.
What should a forex trading plan include?
Include your markets, trading session, setups, entry triggers, stop-loss rules, take-profit rules, position sizing, max risk per trade, max daily or weekly loss, news rules, and a journaling checklist. Add a review schedule and clear “no trade” conditions.
How much should you risk per trade?
Most retail traders cap risk at 0.5% to 2% of account equity per trade. Pick one number and stick to it. Lower risk reduces drawdowns and keeps you trading long enough to learn. Never increase size to “win it back.”
What is a good risk to reward ratio?
Many plans use 1:1 to 1:3. The right ratio depends on your win rate and costs. Test your setup and track expectancy. Tight targets can fail after spreads and slippage. Large targets can lower your win rate.
How do you choose your stop-loss?
Place the stop where your setup becomes invalid, not where the loss feels smaller. Use structure, volatility, or a fixed technical level. Then size your position so the stop distance matches your risk limit. Do not move the stop wider.
How many pairs should you trade?
Start with 1 to 3 pairs. You learn behavior faster and you track results with less noise. Add pairs only after you prove consistency for several weeks. Watch correlation so you do not stack the same risk across multiple trades.
Should you trade forex with a demo first?
Yes. Use a demo to test your rules, practice execution, and build a routine without real losses. Treat it like a live account. Track every trade. Use demo practice and replays to repeat the same setup until errors drop.
How long does it take to know if a plan works?
Judge the plan after a meaningful sample, not after a few trades. Many traders use 50 to 100 trades per setup, with the same rules. Track win rate, average win, average loss, drawdown, and expectancy. Markets change, keep testing.
How do you backtest a forex trading plan?
Define one setup. Write the entry, stop, and exit rules. Test it on historical charts, bar by bar, and record every trade. Include spreads and realistic fills. Then forward test on demo. Do not change rules mid-test.
How do you handle news and high volatility?
Write a rule. You can avoid trading a set window before and after high impact releases, or you can trade only if your setup includes a volatility filter. If spreads widen or fills slip, reduce size or stand aside.
What are common mistakes in forex trading plans?
Vague entry rules, no position sizing, moving stops, overtrading, and changing systems after losses. Another mistake is ignoring costs, spreads, swaps, and slippage. Many plans also miss limits for daily loss and weekly drawdown.
Does a trading plan guarantee profits?
No. A plan controls behavior and risk. It does not remove uncertainty. Many retail accounts lose money, and leverage can magnify losses fast. Use risk capital only. Follow local rules and trade with a regulated broker when possible.
Conclusion
Your trading plan is your operating manual. It sets your rules for entries, exits, position size, and risk. It keeps you from improvising when price moves fast.
Keep it short. Make it testable. Put numbers on every rule. Risk per trade, max daily loss, max weekly drawdown, and minimum R multiple. Include costs like spreads, swaps, and slippage. These details decide your real expectancy.
Final tip. Print your plan or pin it next to your platform. Run a pre trade checklist every time. Then log each trade and review results every week. Change one variable at a time, and only after you backtest the update with the same data rules you use in live trading.
- Write rules you can follow. If you cannot execute it under stress, it is not a plan.
- Protect your downside first. Survive drawdowns, then scale.
- Track your edge. Record R, win rate, and average win and loss, then cut what does not work.
If you need a simple strategy framework to plug into your plan, start with price action trading and build your rules from clean, repeatable setups.
-
Stop Loss vs Take Profit: Differences, Examples & Best Practices
1 month ago -
Forex Order Types Explained: Market vs Limit vs Stop Orders
1 month ago -
How to Start Forex Trading Step by Step (Beginner Roadmap)
1 month ago -
How to Set Stop Loss and Take Profit (Step-by-Step)
1 month ago -
How to Place a Stop Loss in Forex (Beginner-Friendly Guide)
1 month ago
-
-
-
- What is a forex trading plan?
- What should a forex trading plan include?
- How much should you risk per trade?
- What is a good risk to reward ratio?
- How do you choose your stop-loss?
- How many pairs should you trade?
- Should you trade forex with a demo first?
- How long does it take to know if a plan works?
- How do you backtest a forex trading plan?
- How do you handle news and high volatility?
- What are common mistakes in forex trading plans?
- Does a trading plan guarantee profits?
-
-
-
-
- What is a forex trading plan?
- What should a forex trading plan include?
- How much should you risk per trade?
- What is a good risk to reward ratio?
- How do you choose your stop-loss?
- How many pairs should you trade?
- Should you trade forex with a demo first?
- How long does it take to know if a plan works?
- How do you backtest a forex trading plan?
- How do you handle news and high volatility?
- What are common mistakes in forex trading plans?
- Does a trading plan guarantee profits?
-
-
Forex Lot Size Calculator: How to Use It to Size Trades Correctly
1 month ago -
How to Calculate Position Size in Forex (Position Sizing Formula + Examples)
1 month ago -
Forex Leverage Explained: How It Works, Pros, Cons & Examples
1 month ago -
Margin vs Leverage in Forex: What’s the Difference?
1 month ago -
What Is Forex Trading? A Beginner’s Guide to How It Works
1 month ago
-
Forex Trading Platforms Comparison: MetaTrader vs cTrader vs TradingView
1 month ago -
Forex Market Hours & Trading Sessions Explained (Best Times to Trade)
1 month ago -
Forex Leverage Explained: How It Works, Pros, Cons & Examples
1 month ago -
Is Forex Trading Legal in the United States? Rules, Regulators & What to Know
1 month ago -
What Is a Lot Size in Forex? Lot Types + Quick Examples
1 month ago